Hide Code
$ aws cloudformation validate-template --profile your-profile --template-body file:///path/to/shinyproxy-template.yamlCookies
This site uses cookies for essential functionality and anonymized analytics. Accept or manage preferences below.
In a previous post, we documented the steps for deploying shiny applications or interactive documents through shiny-server, rstudio-server, and Amazon EC2. This post documents the steps for deploying apps using Docker, ShinyProxy, Amazon EC2, and Amazon Cognito.
If you are working for an organization that uses AWS, the chances are that your IT department may already have compute instances or protocols for requesting for cloud resources. In that case, seek approval for and obtain the following:
An IAM user or other other IAM entities with a minimum permissions set that allows for the provisioning of EC2 instances, ECR repositories, and Cognito user pools.
To set up the server, we would need to connect to EC2 via a Secure Shell (SSH) using a Command Line Interface (CLI), and so we need to obtain the Amazon EC2 .pem key pair.
The subsequent setup steps will vary depending on whether you’re using your organization’s EC2 instance or setting up your own. For this post, however, we will create our own Amazon Web Services (AWS) account, IAM user and provision AWS resources. The first step is to register for an AWS account, which is free of charge.
The AWS command line interface is a tool for managing AWS services from the command line. Follow the installation instruction here for your operating system. The AWS CLI will be used for the following:
Validating AWS CloudFormation template
Pushing and pulling docker image to and from the Amazon Elastic Container Registry (ECR)
When we first create an Amazon Web Services (AWS) account, a root user with complete access to all AWS services is established. However, it is not recommended to use the root user for everyday tasks. Instead, we should create an IAM user with administrator access to manage routine activities such as user creation and resource provisioning.
To create such a user, follow the official documentation here. Ensure that AWS Management Console access is enabled.
As of 2023, AWS recommends managing access centrally using the IAM Identity Center. While it is still possible to manage access using traditional IAM methods (i.e., with long-term credentials), current AWS documentation encourages transitioning to IAM Identity Center for improved security and efficiency.
The steps in this guide are applicable regardless of whether we are using the traditional IAM method or the IAM Identity Center. As long as we have a user— either IAM or IAM Identity Center-based— with the necessary permissions, the outlined steps can be followed.
For simplicity, though it violates the principle of least privilege, all subsequent resources can be provisioned using an administrator-level user. However, it’s important to remain vigilant about IAM and resource access management best practices, particularly in enterprise environments where security and access control are critical.
To authenticate when connecting to Amazon EC2 instances, a set of credentials called a key pair is required, consisting of a public key and a private key. In the EC2 console, navigate to Network & Security -> Key Pairs and create a new key pair:
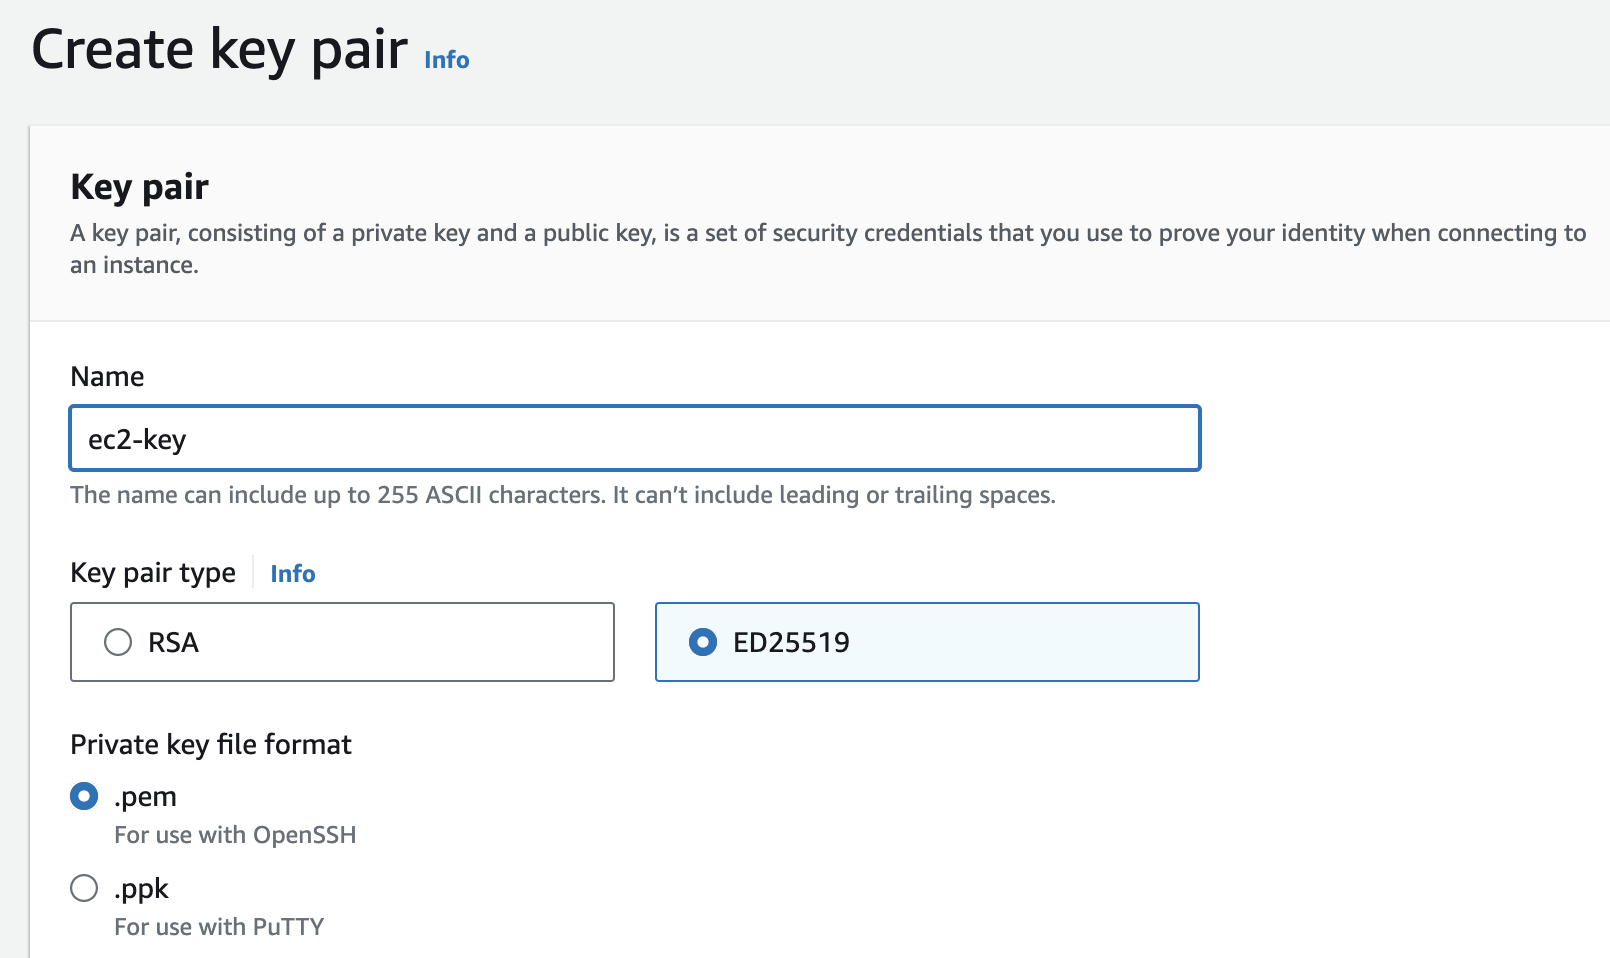
The different types of key pairs correspond to the underlying signature algorithms. For this setup, choose ED25519. After provisioning the key pair, download the private key file (.pem) to our local machine; this .pem file will be used to connect to the EC2 instance via SSH.
AWS CloudFormation is a service that allows us to provision and configure AWS resources (like Amazon EC2 instances, S3 buckets, or Amazon RDS DB instances) using a template that describes them. This means that we no longer have to individually deploy, configure, and terminate AWS services.
With AWS CloudFormation, we describe the resources and their properties in a template file (either written in JSON or YAML) and create a stack, which is a collection of resources. Create a shinyproxy-template.yaml file as follows:
AWSTemplateFormatVersion: '2010-09-09'
Description: CloudFormation template to create a VPC with a single subnet, custom security group, and an EC2 instance.

Parameters:
  WhiteListIP:
    Description: The IP address or range of IPs that will be allowed to SSH into the instance (e.g., IPV4/32)
    Type: String
    AllowedPattern: ^([0-9]{1,3}\.){3}[0-9]{1,3}(\/[0-9]{1,2})?$
    ConstraintDescription: Must be a valid IP CIDR range or a single IP address.

  ImageId:
    Description: AMI ID for the EC2 instance (Defaults to Amazon Linux 2023 AMI)
    Type: String
    Default: ami-066784287e358dad1  # Amazon Linux 2023 AMI

  DeviceName:
    Description: Device name for the root volume on the EC2 instances
    Type: String
    Default: '/dev/xvda'

  InstanceType:
    Description: The EC2 instance type.
    Type: String
    Default: 't3.micro'
    AllowedValues:
      - t2.micro
      - t2.small
      - t2.medium
      - t2.large
      - t2.xlarge
      - t2.2xlarge
      - t3.micro
      - t3.small
      - t3.medium
      - t3.large
      - t3.xlarge
      - t3.2xlarge
    ConstraintDescription: Must be a valid EC2 instance type.

  KeyName:
    Description: The name of the EC2 Key Pair to allow SSH access to the instance.
    Type: AWS::EC2::KeyPair::KeyName
    ConstraintDescription: Must be the name of an existing EC2 Key Pair.

  VolumeSize:
    Description: The size of the EBS volume in GiB, defaults to 30 GiB.
    Type: Number
    Default: 30
    MinValue: 8
    MaxValue: 1024
    ConstraintDescription: Must be between 8 and 1024 GiB.

  DeleteOnTermination:
    Description: Whether to delete the EBS volume when the instance is terminated.
    Type: String
    Default: 'true'

  VpcCIDR:
    Description: Please enter the IP range (CIDR notation) for this VPC
    Type: String
    Default: 10.0.0.0/16

  PublicSubnetCIDR:
    Description: Please enter the IP range (CIDR notation) for the public subnet in the first Availability Zone
    Type: String
    Default: 10.0.0.0/24

  UseElasticIP:
    Description: Set to 'true' to allocate and associate an Elastic IP with the instance, defaults to 'false'.
    Type: String
    Default: 'false'
    AllowedValues:
      - 'true'
      - 'false'

Conditions:
  CreateElasticIP: !Equals [!Ref UseElasticIP, 'true']

Resources:
  VPC:
    Type: AWS::EC2::VPC
    Properties:
      CidrBlock: !Ref VpcCIDR
      EnableDnsSupport: true
      EnableDnsHostnames: true
      Tags:
        - Key: Name
          Value: !Sub ${AWS::StackName}-vpc

  InternetGateway:
    Type: AWS::EC2::InternetGateway
    Properties:
      Tags:
        - Key: Name
          Value: !Sub ${AWS::StackName}-igw

  VPCGatewayAttachment:
    Type: AWS::EC2::VPCGatewayAttachment
    Properties:
      VpcId: !Ref VPC
      InternetGatewayId: !Ref InternetGateway

  PublicRouteTable:
    Type: AWS::EC2::RouteTable
    Properties:
      VpcId: !Ref VPC
      Tags:
        - Key: Name
          Value: !Sub ${AWS::StackName}-rtb

  PublicRoute:
    Type: AWS::EC2::Route
    Properties:
      RouteTableId: !Ref PublicRouteTable
      DestinationCidrBlock: 0.0.0.0/0
      GatewayId: !Ref InternetGateway

  PublicSubnet:
    Type: AWS::EC2::Subnet
    Properties:
      VpcId: !Ref VPC
      CidrBlock: !Ref PublicSubnetCIDR
      MapPublicIpOnLaunch: true
      AvailabilityZone: !Select
        - 0
        - !GetAZs ''
      Tags:
        - Key: Name
          Value: !Sub ${AWS::StackName}-subnet

  PublicSubnetRouteTableAssociation:
    Type: AWS::EC2::SubnetRouteTableAssociation
    Properties:
      SubnetId: !Ref PublicSubnet
      RouteTableId: !Ref PublicRouteTable

  SecurityGroup:
    Type: AWS::EC2::SecurityGroup
    Properties:
      VpcId: !Ref VPC
      GroupDescription: Security group for ShinyProxy EC2 instances controlling inbound traffic
      VpcId: !Ref VPC
      SecurityGroupIngress:
        - CidrIp: '0.0.0.0/0' # Shiny-server port
          IpProtocol: tcp
          FromPort: 3838
          ToPort: 3838
        - CidrIp: '0.0.0.0/0' # Shinyproxy port
          IpProtocol: tcp
          FromPort: 8080
          ToPort: 8080
        - CidrIp: '0.0.0.0/0' # Dash port
          IpProtocol: tcp
          FromPort: 8050
          ToPort: 8050
        - CidrIp: '0.0.0.0/0' # HTTP port
          IpProtocol: tcp
          FromPort: 80
          ToPort: 80
        - CidrIp: '0.0.0.0/0' # HTTPS port
          IpProtocol: tcp
          FromPort: 443
          ToPort: 443
        - CidrIp: !Ref WhiteListIP  # SSH access from the specified IP address or range
          IpProtocol: tcp
          FromPort: 22
          ToPort: 22
      Tags:
        - Key: Name
          Value: !Sub ${AWS::StackName}-sg

  EC2Instance:
    Type: AWS::EC2::Instance
    Properties:
      InstanceType: !Ref InstanceType
      KeyName: !Ref KeyName
      ImageId: !Ref ImageId
      SecurityGroupIds:
        - !Ref SecurityGroup
      SubnetId: !Ref PublicSubnet
      BlockDeviceMappings:
        - DeviceName: !Ref DeviceName
          Ebs:
            VolumeType: gp3
            VolumeSize: !Ref VolumeSize
            DeleteOnTermination: !Ref DeleteOnTermination
      Tags:
        - Key: Name
          Value: !Sub ${AWS::StackName}-instance
    DependsOn: VPCGatewayAttachment

  EIP:
    Condition: CreateElasticIP
    Type: AWS::EC2::EIP
    Properties:
      Domain: vpc
      InstanceId: !Ref EC2Instance
      Tags:
        - Key: Name
          Value: !Sub ${AWS::StackName}-eip
    DependsOn: EC2Instance
The sub-sections below provide some additional details on the most important resources provisioned in this stack.
ami-066784287e358dad1 (Amazon Linux 2023 AMI)/dev/xvda, which is standard for Amazon Linux 2023 AMI.t3.microt2.micro, t2.small, t2.medium, t2.large, t2.xlarge, t2.2xlarge, t3.micro, t3.small, t3.medium, t3.large, t3.xlarge, t3.2xlarge10.0.0.0/1610.0.0.0/24falsetrue, falseThe Virtual Private Cloud (VPC) serves as an isolated virtual network, providing a controlled environment for our AWS resource deployments. Subnets further split this VPC based on availability zones, allowing for public and private resource segregation.
| Resource | Description |
|---|---|
VPC |
The main virtual private cloud resource. |
PublicSubnet |
A subnet with resources accessible from the internet. |
This component ensures that resources within the VPC can connect to the internet.
| Resource | Description |
|---|---|
InternetGateway |
Enables internet access for the VPC. |
Route tables contain a set of rules, called routes, that determine where network traffic is directed. In this template, a route table is defined for the public subnet.
One key route is PublicRoute, which is set up to redirect all outbound traffic to IP (0.0.0.0/0), so the EC2 instance can access the broader internet via the Internet Gateway. This ensures that tools like nginx and shinyproxy can be downloaded from the internet.
| Resource | Description |
|---|---|
PublicRouteTable |
Route table for the public subnet. |
The Elastic Compute Cloud (EC2) is a service offering scalable computing capacity in AWS. This template provisions a single EC2 instance placed in the public subnet.
| Resource | Description |
|---|---|
EC2Instance |
The primary EC2 instance, hosting ShinyProxy. |
Security Groups act as virtual firewalls, controlling inbound and outbound traffic to resources.
| Resource | Description |
|---|---|
SecurityGroup |
Controls traffic for the EC2 instance, including HTTP, HTTPS, SSH, and ports for ShinyProxy and other applications. |
The Elastic IP (EIP) provides a static IP address for the EC2Instance. This is crucial for maintaining consistent access and is particularly important for network configurations where a stable IP is necessary.
| Resource | Description |
|---|---|
EIP |
A static IP address assigned to the EC2 instance for consistent external access. |
Note on dependencies: The EIP is associated with the EC2Instance and has a DependsOn attribute to ensure proper creation order. This is important to align with the VPC and Internet Gateway setup in the template, adhering to AWS best practices.
Before moving on, we can validate the template for syntax issues using the AWS CLI:
$ aws cloudformation validate-template --profile your-profile --template-body file:///path/to/shinyproxy-template.yamlWe are now ready to create the stack from the CloudFormation console.

The CloudFormation template file can be either uploaded directly in the creation interface or stored in an S3 bucket and referenced during stack creation.
The two required parameters in the template are:
KeyName: The name of the key pair to use for SSH access to the EC2 instance. This is the name of the .pem file downloaded earlier.
WhiteListIP: The IP address range that can access the EC2 instance via SSH. This is the IP address of the machine being used to SSH into the EC2 instance. To find the IP address, search “what is my IP address” on Google. For example, if the IPv4 address is 192.168.1.1, enter 192.168.1.1/32 as the value for WhiteListIP.
Everything else can either be left as default or adjusted to meet specific requirements. If an error occurs during stack creation, check the event log for more information.
To connect to our EC2 instance via SSH, we will use the terminal (for windows, use PuTTY). Open the terminal, navigate to the location of our .pem key:
# Set permission for read only by the owner
$ cd path_to_pem_key && chmod 400 my_key.pem
In order to SSH into our EC2 instance:
# Ubuntu
$ ssh -i my_key.pem ubuntu@elastic-ip-address
# Amazon Linux 2023
$ ssh -i my_key.pem ec2-user@elastic-ip-address
The elastic IP address for the EC2 instance can be retreived from “Elastic IPs” tab under “Network & Security” from the side menu of the EC2 console.
The default username for Amazon Linux 2023 is ec2-user. For Ubuntu, the default username is ubuntu.
To disconnect from our instances:
$ exitImportant: From this point on, the command line syntax and tools used to download/install packages will differ depending on the AMI we selected above. In the template above, we chose an AMI that uses Amazon Linux 2023, but Ubuntu is also a popular choice. Therefore, we will include syntax for both of these operating systems.
If you are a Visual Studio Code user, you could follow this Youtube video or Microsoft’s official documentation to set up remote SSH, which allows us to open a remote folder on any remote machine, virtual machine, or container with a running SSH server. Compared to using the terminal, this has the added benefit of allowing us to use a GUI to view files and directory trees on the EC2 instance.
Install docker on the EC2 instance.
Based on the instructions in the official Docker documentation:
# Update command
$ sudo apt-get update
# Install packages to allow apt to use a repository over HTTPS
$ sudo apt-get install -y \
    ca-certificates \
    curl \
    gnupg \
    lsb-release
# Add Docker’s official GPG key
$ sudo mkdir -p /etc/apt/keyrings
$ curl -fsSL https://download.docker.com/linux/ubuntu/gpg | sudo gpg --dearmor -o /etc/apt/keyrings/docker.gpg
# Set up the docker repository
$ echo \
  "deb [arch=$(dpkg --print-architecture) signed-by=/etc/apt/keyrings/docker.gpg] https://download.docker.com/linux/ubuntu \
  $(lsb_release -cs) stable" | sudo tee /etc/apt/sources.list.d/docker.list > /dev/null
# Update
$ sudo apt-get update
# Install
$ sudo apt-get install -y docker-ce docker-ce-cli containerd.io docker-buildx-plugin docker-compose-plugin
# Verify installation
$ sudo docker run hello-world
The difference between apt-get and apt is that the former is an older command with more options while apt is a newer, more user-friendly command with fewer options.
# Update
$ sudo yum update -y
$ sudo yum install -y docker
# Check status
$ sudo systemctl start docker
$ sudo systemctl status dockerAccording to the official documentation, ShinyProxy needs to connect to the docker daemon to spin up the containers for the applications. By default, ShinyProxy will do so on port 2375 of the docker host (our EC2 instance). In order to allow for connections on port 2375, the docker startup options must be modified.
$ sudo mkdir /etc/systemd/system/docker.service.d
$ sudo touch /etc/systemd/system/docker.service.d/override.conf
$ sudo nano /etc/systemd/system/docker.service.d/override.conf# Edit docker.service.d
$ sudo systemctl edit dockerFor both operating systems, add the following content to the docker startup options:
[Service]
ExecStart=
ExecStart=/usr/bin/dockerd -H unix:// -D -H tcp://127.0.0.1:2375
Restart docker:
# Ubuntu
$ sudo systemctl daemon-reload
# Amazon Linux 2023
$ sudo systemctl restart docker$ sudo service docker status
$ sudo service docker start
$ sudo service docker stop
$ sudo service docker restart
$ sudo docker version
# List docker images
$ sudo docker image ls
# Remove docker images with '-f' force remove option
$ sudo docker image rm -f image_id$ sudo systemctl enable docker.service
$ sudo systemctl status docker.service
$ sudo systemctl start docker.service
$ sudo systemctl stop docker.service
$ sudo systemctl restart docker.service
$ sudo docker version
# List docker images
$ sudo docker image ls
# Remove docker images with '-f' force remove option
$ sudo docker image rm -f image_idWe will utilize nginx to set up a reverse proxy for our application. As detailed in my earlier post, the motivation behind this architectural decision is multifaceted. Fundamentally, off-loading SSL encryption tasks to a separate entity, like nginx, ensures efficient resource utilization and optimized performance. This setup is particularly beneficial for a tool like ShinyProxy, where the primary focus is on serving content or running applications.
$ sudo apt-get install -y nginx
$ sudo nginx -v$ sudo yum install -y nginx
$ sudo nginx -v$ sudo service nginx status
$ sudo service nginx start
$ sudo service nginx stop
$ sudo service nginx restart$ sudo systemctl status nginx
$ sudo systemctl start nginx
$ sudo systemctl stop nginx
$ sudo systemctl restart nginxA domain name is simply the name of a website. Examples of domain names include google.com, wikipedia.org, and youtube.com. If we wish to use a domain name rather than the raw IPv4/elastic IP address of our EC2 instance, we need to purchase a domain name. The steps to obtain and set up a custom domain with Google Domain are covered in my previous post.
Once we purchased a domain name, we need to edit the DNS records to point it to our EC2 instance at the elastic IP address. The steps are also covered in the post linked above.
The default data stream transferring over HTTP is not encrypted, so it recommended that we use Hypertext transfer protocol secure (HTTPS). HTTPS uses an encryption protocol that is called Transport Layer Security (TLS). In order to switch from HTTP to HTTPS, we first need to obtain an TSL/SSL certificate, which is a data file hosted in a website’s server that contains the website’s public key and identity, along with other related information. We can usually obtain the certificate from a certificate authority (CA), but this approach has a cost to it. Instead, in this post, we will obtain our certificate from the Let’s Encrypt certificate authority, which is a non-profit entity offering digital certificates for free to anyone who owns a domain name, e.g. ourdomain.com or subdomain.ourdomain.com.
Install certbot based on the software (Nginx) and the operating system (Ubuntu). The instructions for installing certbot uses snaps, which is pre-installed and ready to go on all recent releases of Ubuntu (Ubuntu 16.04 LTS or later, including Ubuntu 22.04 LTS and Ubuntu 23.04).
# Remove any existing certbot installation
$ sudo apt-get remove certbot
# Install certbot
$ sudo snap install --classic certbot
# Create a symbolic link to be able to run certbot
$ sudo ln -s /snap/bin/certbot /usr/bin/certbotFor Amazon Linux 2023, a working installation of certbot on Linux using pip:
# Install some system dependencies
$ sudo yum install -y python3 augeas-libs
# Remove any existing certbot installation
$ sudo yum remove certbot
# Set up a python virtual environment
$ sudo python3 -m venv /opt/certbot/
$ sudo /opt/certbot/bin/pip install --upgrade pip
# Install certbot with nginx plugin
$ sudo /opt/certbot/bin/pip install certbot certbot-nginx
# Create a symbolic link to be able to run certbot
$ sudo ln -s /opt/certbot/bin/certbot /usr/bin/certbotFor both operating systems, we can run the following command to obtain a certificate for our domain.
The --nginx flag tells certbot to use the nginx plugin to obtain the certificate
The certonly option ensures that certbot only obtains the certificate and does not modify the nginx configuration file, which we will manage directly
$ sudo certbot certonly --nginxUpon following the prompts to enter our email address and our domain name, we should see the following output:
IMPORTANT NOTES:
 - Congratulations! Your certificate and chain have been saved at:
   /etc/letsencrypt/live/ourdomain.com/fullchain.pem
   Your key file has been saved at:
   /etc/letsencrypt/live/ourdomain.com/privkey.pem
   Your certificate will expire on 2024-01-05. To obtain a new or
   tweaked version of this certificate in the future, simply run
   certbot again. To non-interactively renew *all* of your
   certificates, run "certbot renew"
 - If you like Certbot, please consider supporting our work by:

   Donating to ISRG / Let's Encrypt:   https://letsencrypt.org/donate
   Donating to EFF:                    https://eff.org/donate-le
To test auto-renew, replacing the ourdomain.com with your domain name:
$ sudo certbot renew --cert-name ourdomain.com --dry-runWe should see the following output:
- - - - - - - - - - - - - - - - - - - - - - - - - - - - - - - - - - - - - - - -
Processing /etc/letsencrypt/renewal/ourdomain.com.conf
- - - - - - - - - - - - - - - - - - - - - - - - - - - - - - - - - - - - - - - -
Cert not due for renewal, but simulating renewal for dry run
Plugins selected: Authenticator nginx, Installer nginx
Account registered.
Simulating renewal of an existing certificate for ourdomain
Performing the following challenges:
http-01 challenge for ourdomain
Using default addresses 80 and [::]:80 ipv6only=on for authentication.
Waiting for verification...
Cleaning up challenges

- - - - - - - - - - - - - - - - - - - - - - - - - - - - - - - - - - - - - - - -
new certificate deployed with reload of nginx server; fullchain is
/etc/letsencrypt/live/ourdomain/fullchain.pem
- - - - - - - - - - - - - - - - - - - - - - - - - - - - - - - - - - - - - - - -

- - - - - - - - - - - - - - - - - - - - - - - - - - - - - - - - - - - - - - - -
Congratulations, all simulated renewals succeeded:
  /etc/letsencrypt/live/ourdomain/fullchain.pem (success)
- - - - - - - - - - - - - - - - - - - - - - - - - - - - - - - - - - - - - - - -
To get a list of all certificates:
$ sudo certbot certificatesFor both operating systems, the certification, chain, and key file should be saved to the following directory:
$ sudo -i
# Substitute for 'ourdomain'
$ cd /etc/letsencrypt/live/ourdomain.com/
To delete a certificate by domain name:
$ sudo certbot delete --cert-name ourdomain.comFinally, an additional improve to the SSL configuration is to generate a better Diffie-Hellman key exchange. To generate a 4096-bit key, run the following command:
$ sudo i
# This may take a while
$ openssl dhparam -out /etc/ssl/certs/dhparam.pem 4096
$ exit
We will ensure that the dhparam.pem file is referenced in the nginx configuration file.
The nginx configuration files are located in the etc (system configuration files) directory:
$ cd /etc/nginx
$ ls
The results of ls may differ depending on the AMI (and thus the operating system) that we used.
With Ubuntu, the default installation of nginx would create a sites-avalable and a sites-enabled directory. Navigate to the /etc/nginx directory, we should see at least the following sub-directories: conf.d, sites-enabled, nginx.conf, sites-available (if not, we can create them). In order to modularize the configuration files, we will create project-based configuration files in the sites-available directory and create a symbolic link in the sites-enabled directory to activate them. Ensure that the following directive is included in the nginx.conf file:
$ sudo service nginx stop
$ sudo nano /etc/nginx/nginx.confhttp {
...
##
# Virtual Host Configs
##
# Ensure that these directives are included
include /etc/nginx/conf.d/*.conf;
include /etc/nginx/sites-enabled/*;
}Create a new configuration file specifically for ShinyProxy:
$ sudo nano /etc/nginx/sites-available/shinyproxy.confThe ShinyProxy official documentation has an example configuration for nginx. With some additional enhancements, copy and paste the following block of directives to the shinyproxy.conf file:
server {
  listen                80;
  # Enter ourdomain.com or subdomain.ourdomain.com
  server_name           ourdomain.com;
  rewrite     ^(.*)     https://$server_name$1 permanent;
}

server {
  listen                443 ssl;
  # Enter ourdomain.com or subdomain.ourdomain.com
  server_name           ourdomain.com;
  access_log            /var/log/nginx/shinyproxy.access.log;
  error_log             /var/log/nginx/shinyproxy.error.log error;

  ssl_protocols TLSv1 TLSv1.1 TLSv1.2;

  # Diffie-Hellman key
  ssl_dhparam /etc/ssl/certs/dhparam.pem;

  # OCSP stapling
  ssl_stapling on;
  ssl_stapling_verify on;

  # Enter the paths to our ssl certificate and key file created in the previous subsection
  ssl_certificate       /etc/letsencrypt/live/ourdomain.com/fullchain.pem;
  ssl_certificate_key   /etc/letsencrypt/live/ourdomain.com/privkey.pem;
  ssl_trusted_certificate /etc/letsencrypt/live/ourdomain.com/chain.pem;

  ssl_session_timeout 1d;
  ssl_session_cache shared:MozSSL:10m;  # About 40000 sessions
  ssl_session_tickets off;

  location / {
      proxy_pass          http://127.0.0.1:8080/;

      proxy_http_version 1.1;
      proxy_set_header Upgrade $http_upgrade;
      proxy_set_header Connection "upgrade";
      proxy_read_timeout 600s;

      proxy_redirect    off;
      proxy_set_header  Host              $http_host;
      proxy_set_header  X-Real-IP         $remote_addr;
      proxy_set_header  X-Forwarded-For   $proxy_add_x_forwarded_for;
      proxy_set_header  X-Forwarded-Proto $scheme;
    }

}
In the configuration file above, substitute all ourdomain.com with our custom domain and modify the paths to the following directives:
ssl_certificate and ssl_certificate_key
ssl_trusted_certificate
ssl_dhparam
Next, we need to create a shortcut (symbolic link) inside the sites-enabled directory. The reason for this is that nginx does not look at sites-available but only the sites-enabled directory in the /etc/nginx/nginx.conf configuration file. We create the .conf files inside sites-available and create a shortcut inside sites-enabled to access it. One benefit of this is that, to temporarily deactivate access to ShinyProxy, we only have to delete the shortcut but not the actual configuration file in sites-available:
$ sudo ln -s /etc/nginx/sites-available/shinyproxy.conf /etc/nginx/sites-enabled/Important: By default, there will be default configuration files located in the sites-available and sites-enabled directories, which we must remove:
$ sudo rm /etc/nginx/sites-enabled/default && sudo rm /etc/nginx/sites-available/defaultOn RedHat, CentOS, and Fedora, the default nginx installation does not create directories such as sites-available and sites-enabled. For these operating systems, the standard directory to store configuration files (ending in .conf) is /etc/nginx/conf.d/*.conf.
Similarly, within the /etc/nginx/nginx.conf configuration file, it’s essential to include the directive include /etc/nginx/conf.d/*.conf; within the http block. This ensures that nginx recognizes and incorporates any .conf files located in the /etc/nginx/conf.d directory. By default, this directive is included in the http block, but it is always good to double-check:
$ sudo systemctl stop nginx
$ sudo nano /etc/nginx/nginx.confhttp {
...
# Load modular configuration files from the /etc/nginx/conf.d directory.
# See http://nginx.org/en/docs/ngx_core_module.html#include
# for more information.
include /etc/nginx/conf.d/*.conf;
}Write the same block of directives in the shinyproxy.conf file:
$ sudo nano /etc/nginx/conf.d/shinyproxy.confserver {
listen 80;
...
}
server {
listen 443 ssl;
...
location / {
proxy_pass http://127.0.0.1:8080/;
...
}Again, make sure to substitute all ourdomain.com with our custom domain and modify the ssl_ paths. Remove the default.d configuration directory:
$ sudo rm -r /etc/nginx/default.dFor both operating systems, to test if the configuration files are syntactically correct, run the following:
$ sudo nginx -tThis should output the results below if the configuration test has passed:
nginx: the configuration file /etc/nginx/nginx.conf syntax is ok
nginx: configuration file /etc/nginx/nginx.conf test is successful
We are now ready to restart nginx:
# Ubuntu
$ sudo service nginx restart
# Amazon Linux 2023
$ sudo systemctl restart nginx
If restart fails, try deleting all running processes on port 80 first:
$ sudo lsof -t -i :80 | xargs sudo killWhen nginx proxies a request, it performs the following steps:
nginx intercepts the request and forwards it to the appropriate server hosting the website or application.nginx waits for the server’s response, which contains the requested information, such as a webpage or application data.nginx receives the server’s response, it sends this information back to the client’s device, allowing interaction with the website or application.Here’s a breakdown of the configuration file details:
| Section/Directive | Description |
|---|---|
server (first block) |
Listens on port 80, the standard port for HTTP, and is responsible for redirecting all HTTP traffic to HTTPS for enhanced security. |
listen 80 |
Configures the server to listen for incoming connections on port 80 (HTTP). |
server_name |
Specifies the domain name for this server block, set here as ourdomain.com. |
rewrite |
Implements a 301 permanent redirect, directing all HTTP traffic to HTTPS on the same domain. |
server (second block) |
Listens on port 443, the standard port for HTTPS, handling secure connections. |
listen 443 |
Configures the server to listen for incoming connections on port 443 (HTTPS). |
access_log and error_log |
Define the locations for nginx’s access and error logs. |
ssl_protocols |
Specifies the allowed TLS protocols, configured here to permit TLS versions 1.0, 1.1, and 1.2. |
ssl_certificate, ssl_certificate_key, and ssl_trusted_certificate |
Provide the paths to the SSL certificate, private key, and trusted CA certificates. |
ssl_stapling and ssl_stapling_verify |
Enable OCSP stapling, a method for verifying the validity of SSL certificates. |
ssl_dhparam |
Specifies the path to the Diffie-Hellman key exchange file for enhanced security. |
location / |
Defines how to handle requests for the root URL (/), configured to proxy these requests to another application running on port 8080. |
proxy_pass |
Directs requests to the specified proxied server. More details are available here. |
proxy_http_version |
Sets the HTTP protocol version for proxying. More details here. |
proxy_set_header (multiple) |
Sets header values that will be passed to the proxied server, crucial for WebSocket support and conveying the original client information. Note: The proxy_set_header X-Forwarded-Proto $scheme is important to ensure that ShinyProxy correctly handles redirects based on HTTP or HTTPS requests. |
proxy_redirect |
Set to off, ensuring that nginx does not modify the “Location” and “Refresh” header fields in the proxied server’s response. |
proxy_read_timeout |
Defines a timeout for reading a response from the proxied server, set to 600 seconds. |
For the latest version of ShinyProxy, Java 17 is required.
Java installation:
# Shinyproxy requires Java 17 (or higher)
$ sudo apt-get -y update
$ sudo apt-get -yq install \
    openjdk-17-jdk \
    openjdk-17-jre
# Check version
$ java -version
Download the most recent version shinyproxy from the official donwload page; for Ubuntu (Debian Linux), download the deb file:
# Shinyproxy latest at the time of writing this post
$ export SHINYPROXY_VERSION="3.1.1"
# Download and install deb file
$ wget https://www.shinyproxy.io/downloads/shinyproxy_${SHINYPROXY_VERSION}_amd64.deb
$ sudo apt install ./shinyproxy_${SHINYPROXY_VERSION}_amd64.deb
$ rm shinyproxy_${SHINYPROXY_VERSION}_amd64.debJava installation instructions:
# Install amazon corretto 17 headless
$ sudo yum install java-17-amazon-corretto-headless -y
$ java -version
Download the most recent version shinyproxy from the official donwload page; for Amazon Linux 2023, download the rpm file:
$ export SHINYPROXY_VERSION="3.1.1"
# Downloads RPM package file to current directory
$ sudo wget https://www.shinyproxy.io/downloads/shinyproxy_${SHINYPROXY_VERSION}_x86_64.rpm
$ sudo yum localinstall -y ./shinyproxy_${SHINYPROXY_VERSION}_x86_64.rpm
$ sudo rm ./shinyproxy_${SHINYPROXY_VERSION}_x86_64.rpm
# Check installation
$ sudo systemctl status shinyproxy
If the installation fails due to missing dependencies, try installing without dependency checks:
$ sudo rpm -i --nodeps shinyproxy_${SHINYPROXY_VERSION}_x86_64.rpm$ sudo service shinyproxy status
$ sudo service shinyproxy start
$ sudo service shinyproxy stop
$ sudo service shinyproxy restart$ sudo systemctl status shinyproxy
$ sudo systemctl start shinyproxy
$ sudo systemctl stop shinyproxy
$ sudo systemctl restart shinyproxyShinyProxy is configured using the application.yml file. For both operating systems, we should find this configuration file in the same location:
$ sudo nano /etc/shinyproxy/application.ymlThe file below is the default configuration created by installing ShinyProxy:
proxy:
  title: Open Analytics Shiny Proxy
  logo-url: https://www.openanalytics.eu/shinyproxy/logo.png
  landing-page: /
  heartbeat-rate: 10000
  heartbeat-timeout: 60000
  port: 8080
  authentication: simple
  admin-groups: scientists
  # Example: 'simple' authentication configuration
  users:
    - name: jack
      password: password
      groups: scientists
    - name: jeff
      password: password
      groups: mathematicians
    port-range-start: 20000
  specs:
    - id: 01_hello
      display-name: Hello Application
      description: Application which demonstrates the basics of a Shiny app
      container-cmd: [ "R", "-e", "shinyproxy::run_01_hello()" ]
      container-image: openanalytics/shinyproxy-demo
      access-groups: [ scientists, mathematicians ]
    - id: 06_tabsets
      container-cmd: [ "R", "-e", "shinyproxy::run_06_tabsets()" ]
      container-image: openanalytics/shinyproxy-demo
      access-groups: scientists

logging:
  file:
    name: shinyproxy.log
For an in-depth explanation of each directive in the configuration file, refer to the official ShinyProxy documentation. Here are some key points to understand the basic setup:
Port: The port directive is set to 8080, which corresponds to one of the ports for which a inbound rule was created in the security group associated with the VPC.
Authentication: By default, ShinyProxy allows us to specify users and their access levels via the authentication directive. While the simple authentication mode is a straightforward approach, we might want to consider more secure authentication methods. Fortunately, ShinyProxy is compatible with various authentication protocols such as the OpenID Connect. We will set up a more secure authentication method in last section of this post.
Apps: Every application that ShinyProxy serves requires its own configuration under the specs section. We will delve into this after containerizing our Shiny and Dash applications in the subsequent section.
To ensure ShinyProxy is working as expected, we can pull the demo application image from OpenAnalytics’ dockerhub:
$ sudo docker pull openanalytics/shinyproxy-demoRestart ShinyProxy:
# Ubuntu
$ sudo service shinyproxy restart
# Amazon Linux 2023
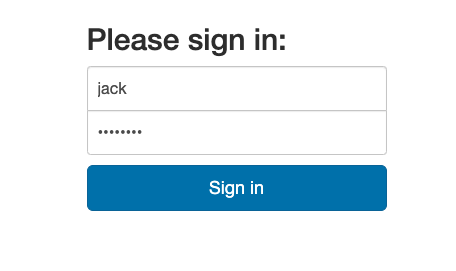
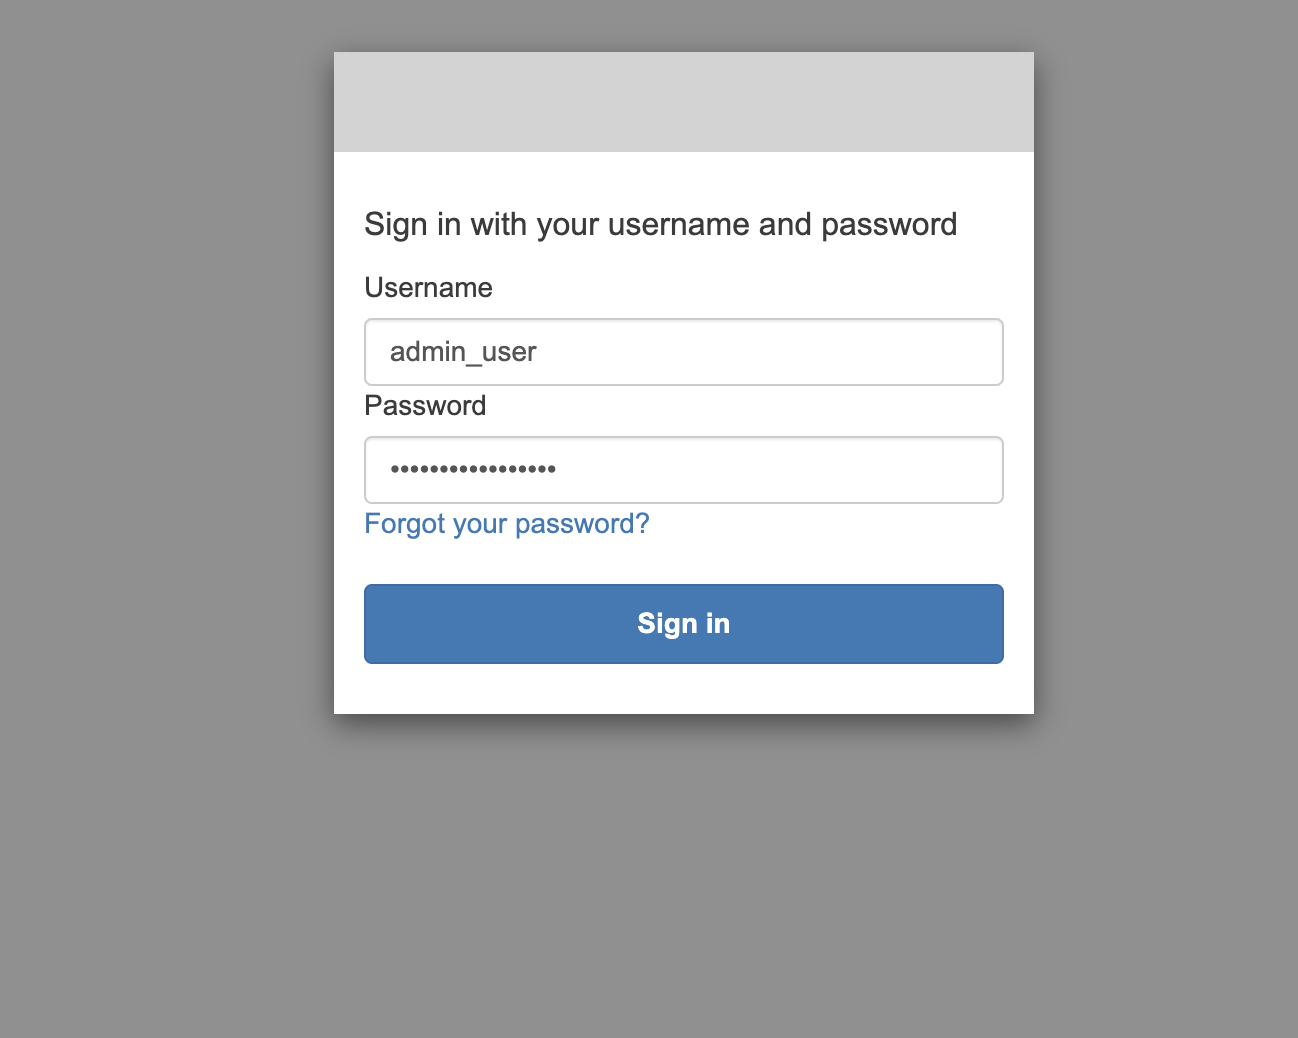
$ sudo systemctl restart shinyproxyWe should now be able to access the ShinyProxy login page at the following URL: https://ourdomain or https://subdomain.ourdomain. The login credentials are contained in the sample configuration file above.
# Ubuntu
$ sudo service shinyproxy stop
# Amazon Linux 2023
$ sudo systemctl stop shinyproxyBecause nginx will pass requests to port 8080 on the loopback interface (127.0.0.1) based on the proxy_pass directive in the nginx configuration file. The ShinyProxy documentation recommends that we restrict ShinyProxy to bind only on 127.0.0.1 (and not to the default 0.0.0.0). We can set the bind-address in the application.yml configuration file:
proxy:
  [...] # Other proxy settings
bind-address: 127.0.0.1 # Add this under the proxy entryWe can add the proxy.container-log-path directive to the application.yml configuration file to specify the path where the container logs will be written. This is useful for debugging purposes:
proxy:
  [...] # Other proxy settings
  bind-address: 127.0.0.1
  container-log-path: /var/log/shinyproxy # Add this under the proxy entry
Once enabled, ShinyProxy will create log files with the following naming conventions:
<specId>_<proxyId>_<startupTime>_stdout.log
<specId>_<proxyId>_<startupTime>_stderr.log
For more details, see the ShinyProxy documentation.
The updated default configuration should look like this:
proxy:
  title: Open Analytics Shiny Proxy
  logo-url: https://www.openanalytics.eu/shinyproxy/logo.png
  landing-page: /
  heartbeat-rate: 10000
  heartbeat-timeout: 60000
  port: 8080
  bind-address: 127.0.0.1 # Added the bind-address directive
  container-log-path: /var/log/shinyproxy # Added the container-log-path directive
  docker:
    port-range-start: 20000

  authentication: simple
  admin-groups: scientists
  users:
    - name: jack
      password: password
      groups: scientists
    - name: jeff
      password: password
      groups: mathematicians

  specs:
    - id: 01_hello
      display-name: Hello Application
      description: Application which demonstrates the basics of a Shiny app
      container-cmd: [ "R", "-e", "shinyproxy::run_01_hello()" ]
      container-image: openanalytics/shinyproxy-demo
      access-groups: [ scientists, mathematicians ]
    - id: 06_tabsets
      container-cmd: [ "R", "-e", "shinyproxy::run_06_tabsets()" ]
      container-image: openanalytics/shinyproxy-demo
      access-groups: scientists

server:
  forward-headers-strategy: native # Added the forward-headers-strategy directive
  secure-cookies: true # Added the secure-cookies directive

logging:
  file:
    name: shinyproxy.log
Upon restart, Shinyproxy should now be accessible at https://ourdomain.com or https://subdomain.ourdomain.com with the updated configurations.
# Ubuntu
$ sudo service shinyproxy restart
# Amazon Linux 2023
$ sudo systemctl restart shinyproxyTo build images for our applications, we have two primary options:
Using the EC2 Host: We can directly utilize the compute resources of our EC2 host. For small applications, this approach is straightforward and sufficient. However, for more complex applications, this may not be optimal due to the differing resource requirements during build-time and run-time. Additionally, tying up our EC2 host with the build process could lead to memory issues.
Using Other Hosts: Alternatively, we can use our local machine (or any other machine that supports Docker such as a github-hosted runner) to build the images. Once built, these images can be pushed to the Elastic Container Registry (ECR) and then pulled onto our EC2 host for deployment. This option offers greater flexibility, allowing us to leverage the resources of any machine for the build process.
The following subsections assume that docker is installed on both the EC2 host and our local machine. Additionally, both machines used for building images and the EC2 instance should have the AWS Command Line Interface configured.
We will illustrate the deployment of two simple applications: one built with R Shiny and the other with Python Dash.
On the machine that will be used for building the images, create a directory for the Shiny application:
.
└── shiny_app
    ├── Dockerfile.shiny
    └── app.R
The app.R script contains the code for our Shiny application. This simple application achieves the following:
Simulates predictors
The response variable
The user can select the regularization parameter
The application plots the coefficients of the lasso and ridge regression models to illustrate the effects of regularization on the statistical significance of point estimators for the known parameters.
library(bs4Dash)
library(shiny)
library(glmnet)
library(plotly)

# Simulation function -----------------------------------------------------

simulate_data <- function(n = 1000) {
  # Predictor variables used to simulate the response variable
  significant_predictors <- lapply(
    c("x1", "x2", "x3"),
    function(x) rnorm(n = n, mean = 0, sd = 1)
  )

  # Predictor variables not used to simulate the response variable
  insignificant_predictors <- lapply(
    c("x4", "x5", "x6"),
    function(x) rnorm(n = n, mean = 0, sd = 1)
  )

  # True parameter values
  b_1 <- 12.34
  b_2 <- 23.45
  b_3 <- 2.45

  # Simulate the response variable
  intercept <- 20
  y <- intercept + b_1 * significant_predictors[[1]] +
      b_2 * significant_predictors[[2]] + b_3 * significant_predictors[[3]]

  # Standardize the response variable
  y <- (y - mean(y)) / sd(y)

  data <- data.frame(
    y = y,
    x1 = significant_predictors[[1]],
    x2 = significant_predictors[[2]],
    x3 = significant_predictors[[3]],
    x4 = insignificant_predictors[[1]],
    x5 = insignificant_predictors[[2]],
    x6 = insignificant_predictors[[3]]
  )

  return(data)
}

# Train models ------------------------------------------------------------

train_models <- function(data, regularization_strength) {
  predictors <- c("x1", "x2", "x3", "x4", "x5", "x6")

  # Train models
  lasso <- glmnet(
    x = as.matrix(data[, predictors]),
    y = data$y,
    alpha = 1,
    lambda = regularization_strength
  )

  ridge <- glmnet(
    x = as.matrix(data[, predictors]),
    y = data$y,
    alpha = 0,
    lambda = regularization_strength
  )

  # Coefficients
  coefs <- data.frame(
    predictor = rep(predictors, times = 2),
    beta = c(coef(ridge)[predictors, ], coef(lasso)[predictors, ]),
    model = rep(c("Ridge", "Lasso"), each = length(predictors))
  )

  return(coefs)
}

# UI ----------------------------------------------------------------------

ui <- bs4DashPage(
  title = "Shiny Application",
  header = bs4DashNavbar(disable = TRUE),
  sidebar = bs4DashSidebar(disable = TRUE),
  body = bs4DashBody(
    bs4Card(
      sliderInput(
        inputId = "regularization_strength",
        label = "Use the slider to change the regularization strength for Lasso and Ridge regression models:",
        min = 0,
        max = 1,
        value = 0.2
      ),
      title = "Regularization Strength",
      width = 12
    ),
    bs4Card(
      plotlyOutput("box_plot"),
      width = 12
    )
  ),
  controlbar = dashboardControlbar(disable = TRUE)
)

# Server ------------------------------------------------------------------

server <- function(input, output) {
  # Simulate 200 data sets, each with 200 observations
  data <- reactive({
    replicate(200, simulate_data(n = 200), simplify = FALSE)
  })

  # Train models for each data set
  results <- reactive({
    models <- lapply(data(), train_models, regularization_strength = input$regularization_strength)
    # Combine results (row-bind)
    do.call(rbind, models)
  })

  # Box plot
  output$box_plot <- renderPlotly({
    plot_ly(
      data = results(),
      x = ~predictor,
      y = ~beta,
      color = ~model,
      type = "box"
    ) %>%
      layout(
        title = "Box plot",
        xaxis = list(title = "Predictor"),
        yaxis = list(title = "Coefficient")
      )
  })
}

shinyApp(ui, server)
The Dockerfile.shiny file packages the application code for deployment. A Dockerfile is a text file containing instructions to assemble an image by layer. This Dockerfile builds from the r-base image, a Debian-based linux image for R. For more Docker images for R, see the Rocker Project. The installation of R packages makes use of the install.r script, which is a part of littler package.
FROM r-base:4.3.2

WORKDIR /shiny_app

COPY app.R ./

# System dependencies for R packages (bs4Dash & plotly)
RUN apt-get update && \
    apt-get install -y --no-install-recommends \
    libcurl4-openssl-dev libssl-dev && \
    rm -rf /var/lib/apt/lists/*

# Install required R packages
RUN install.r --ncpus -1 shiny bs4Dash glmnet plotly

EXPOSE 3838

CMD ["R", "-q", "-e", "shiny::runApp('/shiny_app/app.R', port = 3838, host = '0.0.0.0')"]Create a new directory for the Dash application:
.
├── dash_app
│ ├── Dockerfile.dash
│ ├── app.py
│ ├── entrypoint.py
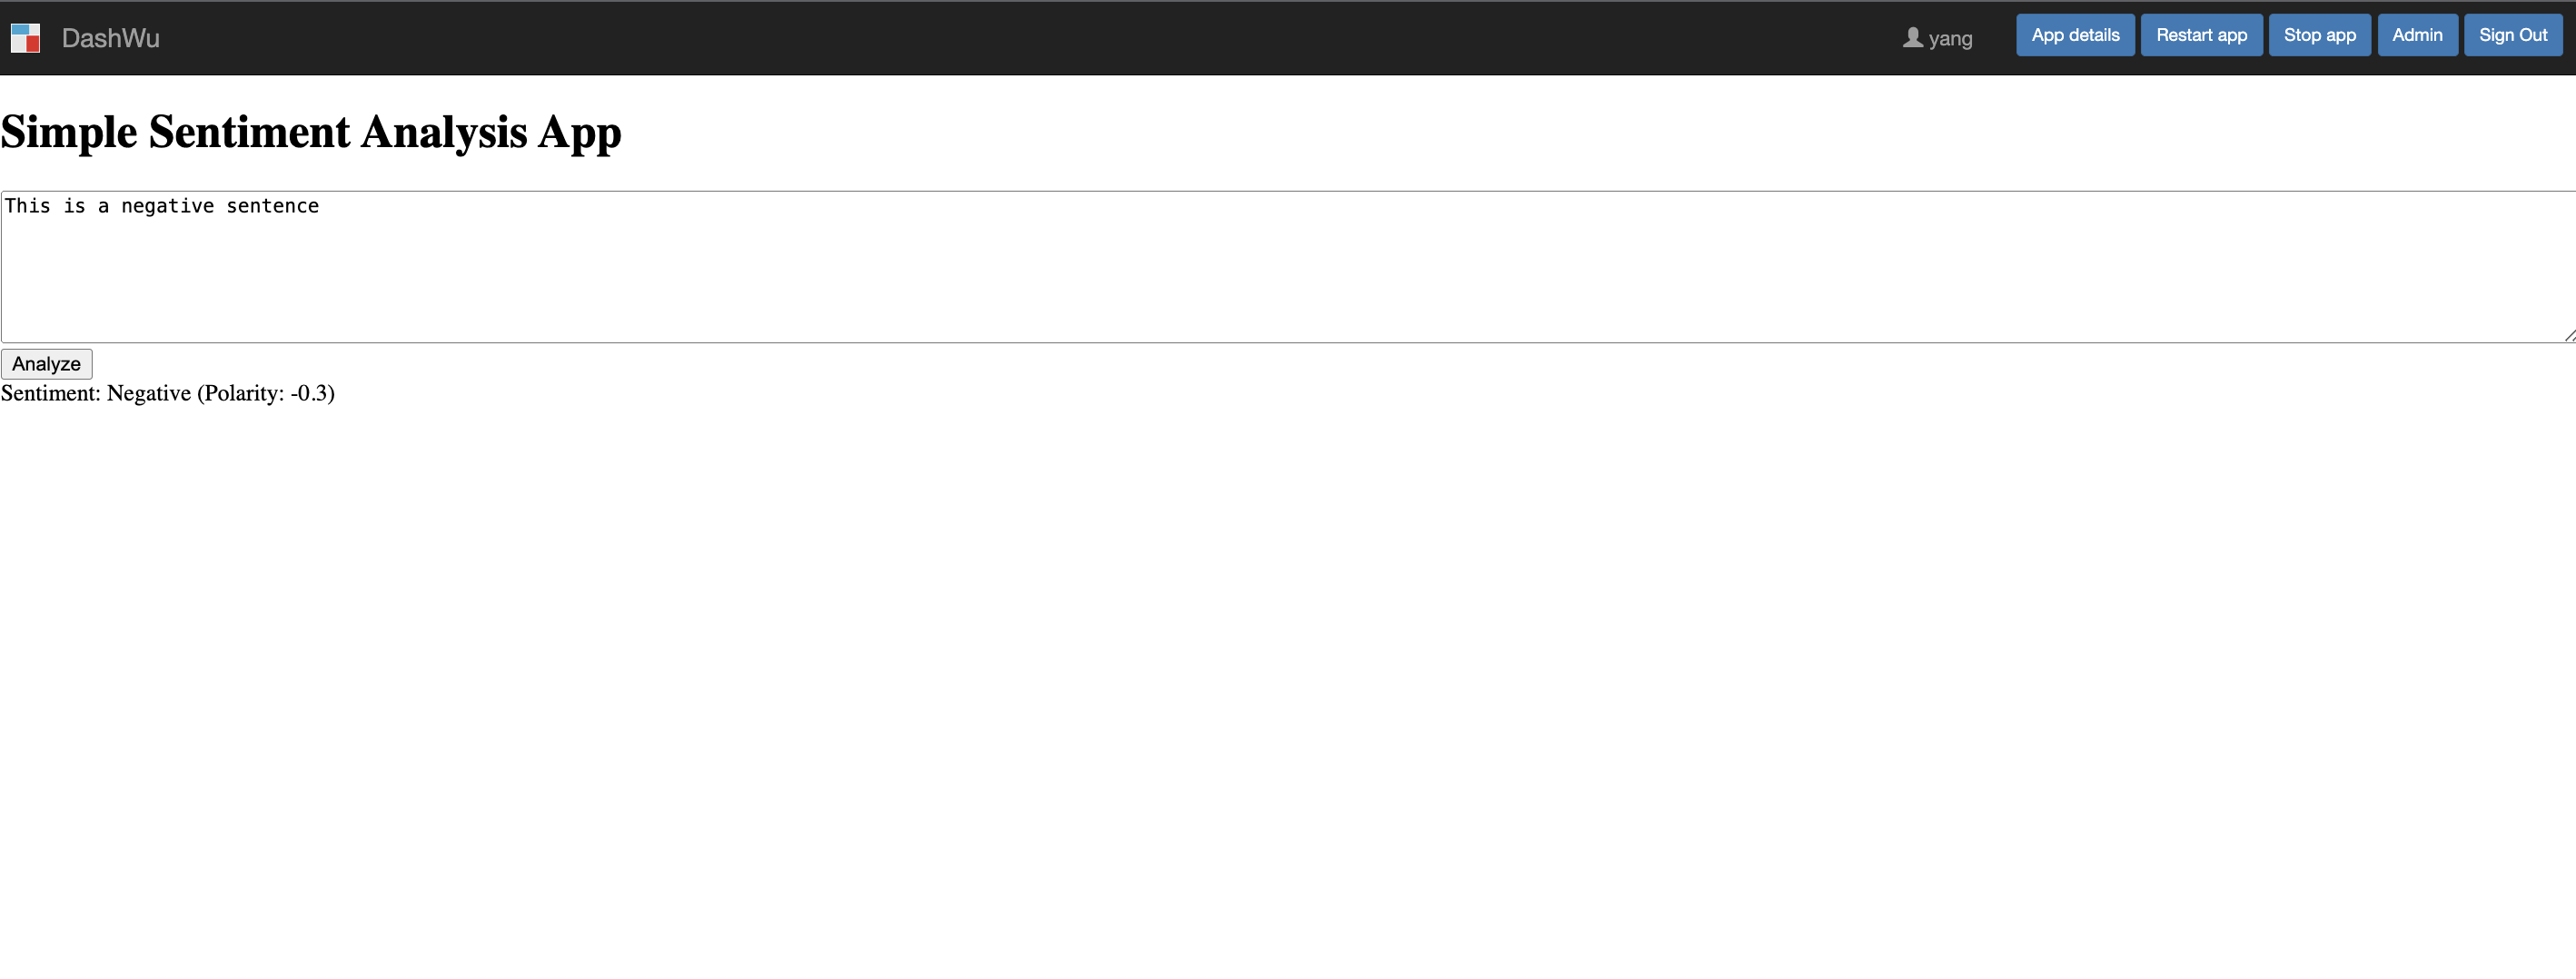
│ └── requirements.txtThe app.py file contains the Dash application code, which is a sentiment analysis app. The app allows users to enter text and analyze the sentiment of the text. The sentiment analysis is performed using the TextBlob library, which is a Python library for processing textual data. The front-end is built with Dash, a python framework for building web applications.
import os
import dash
from dash import html, dcc
from dash.dependencies import Input, Output
from textblob import TextBlob

app = dash.Dash(
    __name__,
    suppress_callback_exceptions=True,
    requests_pathname_prefix=os.environ['SHINYPROXY_PUBLIC_PATH'],
    routes_pathname_prefix=os.environ['SHINYPROXY_PUBLIC_PATH']
)
server = app.server

app.layout = html.Div([
    html.H1('Simple Sentiment Analysis App'),
    dcc.Textarea(
        id='text-input',
        value='',
        style={'width': '100%', 'height': 100},
        placeholder='Enter text here...'
    ),
    html.Button('Analyze', id='analyze-button'),
    html.Div(id='output-container')
])

@app.callback(
    Output('output-container', 'children'),
    [Input('analyze-button', 'n_clicks')],
    [dash.dependencies.State('text-input', 'value')]
)
def update_output(n_clicks, input_value):
    if n_clicks and input_value:
        analysis = TextBlob(input_value)
        sentiment_polarity = analysis.sentiment.polarity
        sentiment = 'Positive' if sentiment_polarity > 0 else 'Negative' if sentiment_polarity < 0 else 'Neutral'
        return f'Sentiment: {sentiment} (Polarity: {sentiment_polarity})'
    return 'Enter some text and click Analyze.'

if __name__ == '__main__':

    app.run_server(debug=True)
Dash requires knowledge of the path used to access the app. ShinyProxy makes this path available as an environment variable SHINYPROXY_PUBLIC_PATH. Next, the requirements.txt file lists the python libraries required for the Dash app:
textblob==0.17.1
dash==2.14.1
plotly==5.18.0
gunicorn==21.2.0
We create an entrypoint.py file to start the Dash application using gunicorn, a WSGI HTTP Server for UNIX. This is one of the recommended ways to deploy Dash applications in production. For more information on the entrypoint script, see the gunicorn documentation on custom application.
import os
from typing import Dict, Any
from gunicorn.app.base import BaseApplication

# Importing the Dash app
from app import server as application

class StandaloneApplication(BaseApplication):
    """
    A standalone application to run a Dash app with Gunicorn. This
    class is designed to configure and run a Dash application using
    the Gunicorn WSGI HTTP server.

    Attributes
    ----------
    application : Any
        The Dash application instance to be served by Gunicorn.
    options : Dict[str, Any], optional
        A dictionary of configuration options for Gunicorn.
    """
    def __init__(self, app: Any, options: Dict[str, Any] = None) -> None:
        """
        Constructor for StandaloneApplication with a Dash app and options.

        Parameters
        ----------
        app : Any
            The Dash application instance to serve.
        options : Dict[str, Any], optional
            A dictionary of Gunicorn configuration options.
        """
        self.options = options or {}
        self.application = app
        super(StandaloneApplication, self).__init__()

    def load_config(self):
        """
        Load the configuration from the provided options. This method
        extracts the relevant options from the provided dictionary and
        sets them for the Gunicorn server.
        """
        config = {key: value for key, value in self.options.items()
                  if key in self.cfg.settings and value is not None}
        for key, value in config.items():
            self.cfg.set(key.lower(), value)

    def load(self) -> Any:
        """
        Return the application to be served by Gunicorn. This method is
        required by Gunicorn and is called to get the application instance.

        Returns
        -------
        Any
            The Dash application instance to be served.
        """
        return self.application

def main() -> int:

    # Retrieve the SHINYPROXY_PUBLIC_PATH from environment variable
    public_path = os.environ['SHINYPROXY_PUBLIC_PATH']

    options = {
        'bind': '0.0.0.0:8050',
        'workers': 4,
        'env': {'SHINYPROXY_PUBLIC_PATH': public_path},
    }

    StandaloneApplication(application, options).run()

    return 0

if __name__ == '__main__':

    main()
The Dockerfile.dash in the dash_app directory would be similar to Dockerfile.shiny, but tailored to the Dash application:
FROM python:3.10.13-slim-bullseye

WORKDIR /dash_app

COPY requirements.txt requirements.txt
RUN pip3 install -r requirements.txt

COPY app.py entrypoint.py ./

EXPOSE 8050
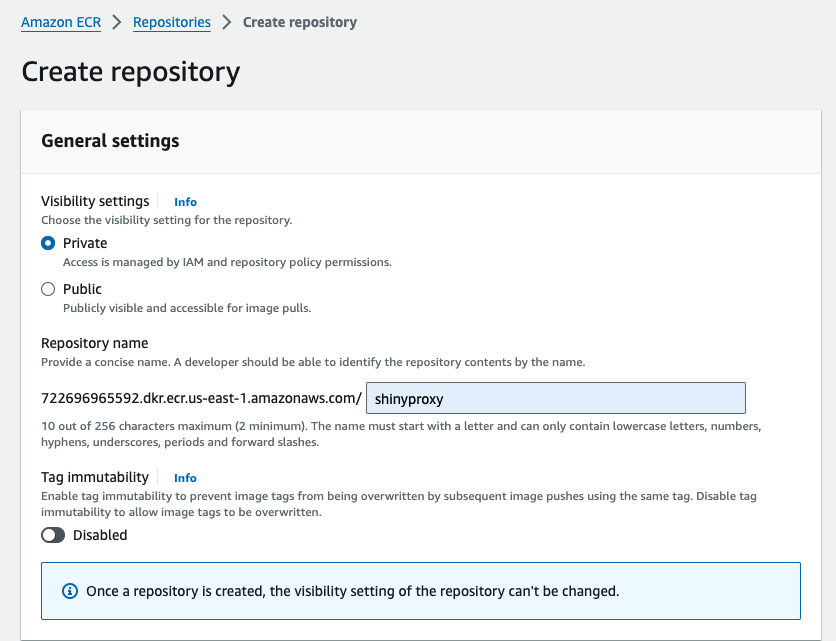
CMD ["python3", "entrypoint.py"]With the application source files created, we can build the images and push the images to ECR. Create a new private ECR repository by following the steps here:
Next, we will create a bash script build_and_push.sh to automate the following steps:
Build the docker images on the local machine
Obtain the AWS account ID and region and log in to the ECR registry
Push the docker images to ECR
Note that the following script assumes that the AWS CLI is installed and configured on the local machine with permissions to push to ECR, and that the user has sudo privilege.
#!/bin/bash

source "$(dirname "$0")/platform_selection.sh"

# Function to prompt for input if arguments are not provided
prompt_for_input() {
    read -p "Enter the absolute path to the Dockerfile: " docker_image_path
    read -p "Enter the custom image tag name: " image_tag
    read -p "Enter the ECR repository name: " ecr_repo
    read -p "Enter the AWS CLI credential profile name: " credential_profile
    # Prompt the user for the target platform
    select_target_platform
}

# Check if the required number of arguments is passed, otherwise prompt for input
if [ "$#" -eq 5 ]; then
    docker_image_path="$1"
    image_tag="$2"
    ecr_repo="$3"
    credential_profile="$4"
    target_platform="$5"
else
    prompt_for_input
fi

# Validate that all necessary inputs are provided
if [ -z "$docker_image_path" ] || [ -z "$image_tag" ] || [ -z "$ecr_repo" ] || [ -z "$credential_profile" ] || [ -z "$target_platform" ]; then
    echo "Error: Missing required inputs. Please provide the Dockerfile path, image tag, ECR repository name, AWS CLI credential profile name, and target platform."
    exit 1
fi

# Set the build context to the parent directory of the Dockerfile
build_context=$(dirname "$docker_image_path")

# AWS variables
account_id=$(aws sts get-caller-identity --profile "$credential_profile" --query Account --output text)
region=$(aws configure --profile "$credential_profile" get region)
image_name="$account_id.dkr.ecr.$region.amazonaws.com/$ecr_repo:$image_tag"

# Log in to the ECR registry
aws ecr get-login-password --profile "$credential_profile" --region "$region" | docker login --username AWS --password-stdin "$account_id.dkr.ecr.$region.amazonaws.com"

# Build and push the Docker image with the specified target platform
docker build --platform "$target_platform" -f "$docker_image_path" -t "$image_name" "$build_context"

if [ $? -ne 0 ]; then
    echo "Error: Docker build failed."
    exit 1
fi

docker push "$image_name"

if [ $? -ne 0 ]; then
    echo "Error: Docker push failed."
    exit 1
fi

echo "Docker image successfully built and pushed to ECR: $image_name"
The select_target_platform function in the script allows the user to select the target platform for the Docker image build. The function is defined in a separate script platform_selection.sh:
#!/bin/sh

# Function to prompt user for target platform selection
select_target_platform() {
    echo "Select the target platform:"
    echo "1) amd64 (linux/amd64)"
    echo "2) arm64 (linux/arm64)"
    echo "3) both (linux/amd64, linux/arm64)"

    read -p "Enter your choice (1-3): " choice

    case $choice in
        1)
            target_platform="linux/amd64"
            ;;
        2)
            target_platform="linux/arm64"
            ;;
        3)
            target_platform="linux/amd64,linux/arm64"
            ;;
        *)
            echo "Invalid choice. Please select 1, 2, or 3."
            select_target_platform
            ;;
    esac
}
The build_and_push.sh script can be run as follows:
$ bash build_and_push.sh \
      /path/to/Dockerfile \
      IMAGE-TAG \
      ECR-REPO \
      AWS-CREDENTIAL-PROFILE \
      TARGET-PLATFORM
Once the processes are complete, the images should be available in the ECR repository:
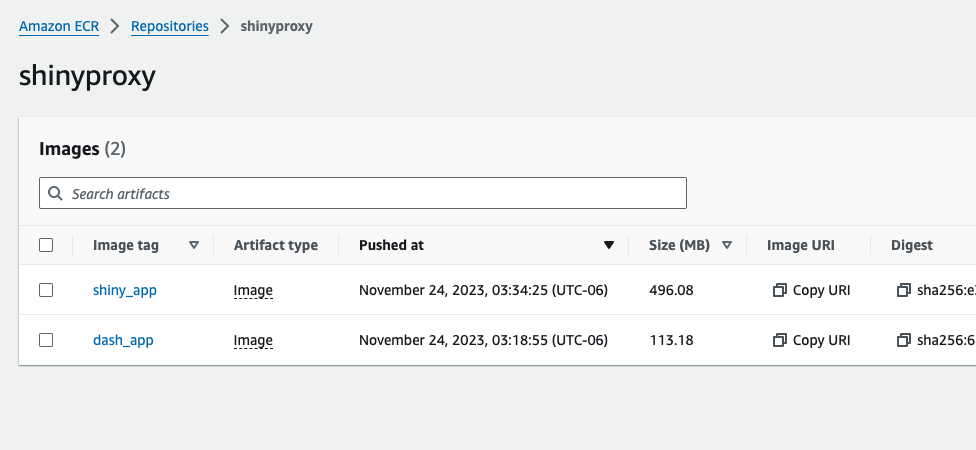
We can check that these images exist with:
$ aws ecr describe-images --profile AWS-CREDENTIAL-PROFILE --repository-name ECR-REPOWith our containerized applications built and pushed to ECR, we are now ready to pull the images and run them on our EC2 instance. Start by configuring the AWS CLI on the EC2 instance to access the ECR repository.
Configure the AWS CLI:
# Follow the prompts to enter your credentials
$ aws configure --profile AWS-CREDENTIAL-PROFILE
Log in to Docker using the AWS credentials:
$ aws ecr get-login-password \
    --profile AWS-CREDENTIAL-PROFILE \
    --region AWS-REGION | \
  sudo docker login \
    --username AWS \
    --password-stdin \
    AWS-ACCOUNT-ID.dkr.ecr.AWS-REGION.amazonaws.com
Pull the images from ECR using their URIs, which follow this format: {AWS-ACCOUNT-ID}.dkr.ecr.{AWS-REGION}.amazonaws.com/{ECR-REPO}:{IMAGE-TAG}.
$ sudo docker pull IMAGE-URIVerify that the images are available on the EC2 instance:
$ sudo docker image lsExample output:
REPOSITORY                                                TAG         IMAGE ID       CREATED             SIZE
722696965592.dkr.ecr.us-east-1.amazonaws.com/shinyproxy   shiny_app   203637949297   5 minutes ago       1.05GB
722696965592.dkr.ecr.us-east-1.amazonaws.com/shinyproxy   dash_app    e69d02fa8bb4   6 minutes ago       316MB
This ensures the images are now available on the EC2 instance, ready to be deployed.
Finally, update the ShinyProxy configuration file to use the new images:
# Ubuntu
$ sudo service shinyproxy stop
# Amazon Linux 2023
$ sudo systemctl stop shinyproxy
Open the ShinyProxy configuration file:
$ sudo nano /etc/shinyproxy/application.ymlproxy:
title: ShinyProxy
landing-page: /
bind-address: 127.0.0.1
heartbeat-rate: 10000
heartbeat-timeout: 60000
port: 8080
container-log-path: /var/log/shinyproxy # Added the container-log-path directive
docker:
port-range-start: 20000
authentication: simple
admin-groups: admin_users
users:
- name: admin_user
password: password
groups: admin_users
- name: shiny_user
password: password
groups: shiny_users
- name: dash_user
password: password
groups: dash_users
specs:
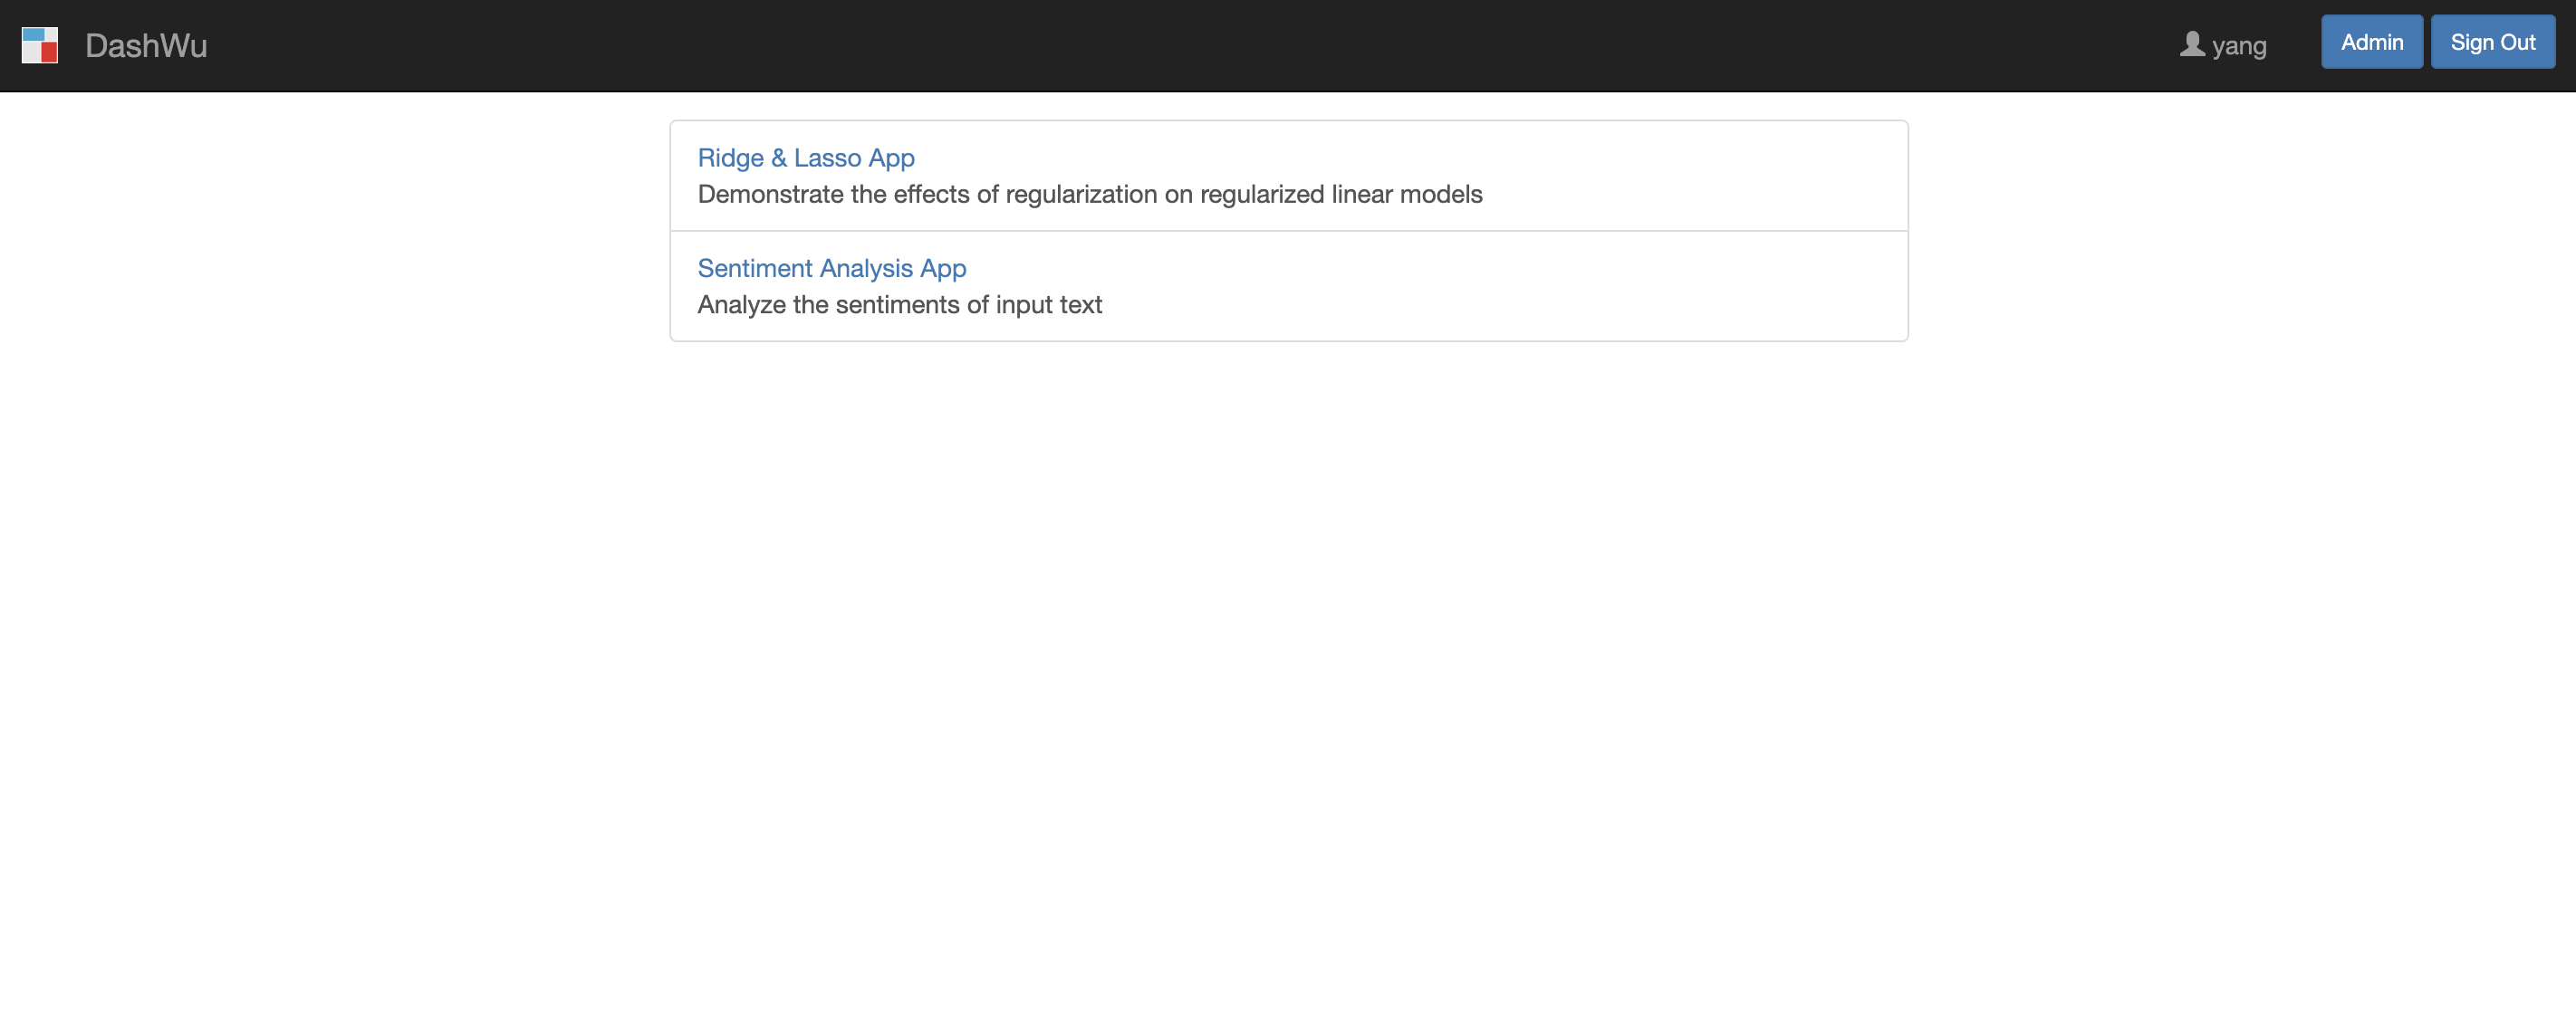
- id: shiny-app
display-name: Ridge & Lasso App
description: Demonstrate the effects of regularization on regularized linear models
container-image: {AWS-ACCOUNT-ID}.dkr.ecr.{AWS-REGION}.amazonaws.com/{ECR-REPO}:{IMAGE-TAG}
access-groups: [admin_users, shiny_users] # Accessible only by the admin and shiny_users groups
- id: dash-app
display-name: Sentiment Analysis App
description: Analyze the sentiments of input text
port: 8050
container-image: {AWS-ACCOUNT-ID}.dkr.ecr.{AWS-REGION}.amazonaws.com/{ECR-REPO}:{IMAGE-TAG}
target-path: "#{proxy.getRuntimeValue('SHINYPROXY_PUBLIC_PATH')}"
access-groups: [admin_users, dash_users] # Accessible only by the admin and dash_users groups
server:
forward-headers-strategy: native # Added the forward-headers-strategy directive
secure-cookies: true # Added the secure-cookies directive
logging:
file:
name: shinyproxy.logThe user groups are set up as an example to ensure that shiny_user and dash_user have access only to the Shiny and Dash apps, respectively. The admin_user has access to all apps.
Remember to replace all placeholders with the appropriate values: {AWS-ACCOUNT-ID}.dkr.ecr.{AWS-REGION}.amazonaws.com/{ECR-REPO}:{IMAGE-TAG}. After updating, restart ShinyProxy.
# Ubuntu
$ sudo service shinyproxy start
# Amazon Linux 2023
$ sudo systemctl start shinyproxy
We can now access the ShinyProxy landing page by entering the domain or subdomain in the browser.

ShinyProxy supports various authentication methods, including OpenID Connect (OIDC). OIDC allows users to authenticate via a third-party identity provider. In this section, we’ll set up OIDC authentication using Amazon Cognito, a managed service for authentication, authorization, and user management.
| Entity | Description |
|---|---|
| User | The individual accessing applications hosted on our EC2 instance, authenticated via Amazon Cognito. |
| Client | ShinyProxy acts as the client, requesting tokens from Amazon Cognito to authenticate users and access resources. |
| Relying Party (RP) | ShinyProxy also serves as the Relying Party (RP), outsourcing user authentication to Amazon Cognito, the identity provider. |
| OpenID Provider (OP) or Identity Provider (IDP) | Amazon Cognito serves as the OpenID Provider (OP) or Identity Provider (IDP), handling authentication and issuing tokens (such as ID and access tokens) back to ShinyProxy. |
The IDP manages users, including their credentials and other information. According to the ShinyProxy documentation, the login process with ShinyProxy is as follows:
This flow is called the Authorization Code Grant:
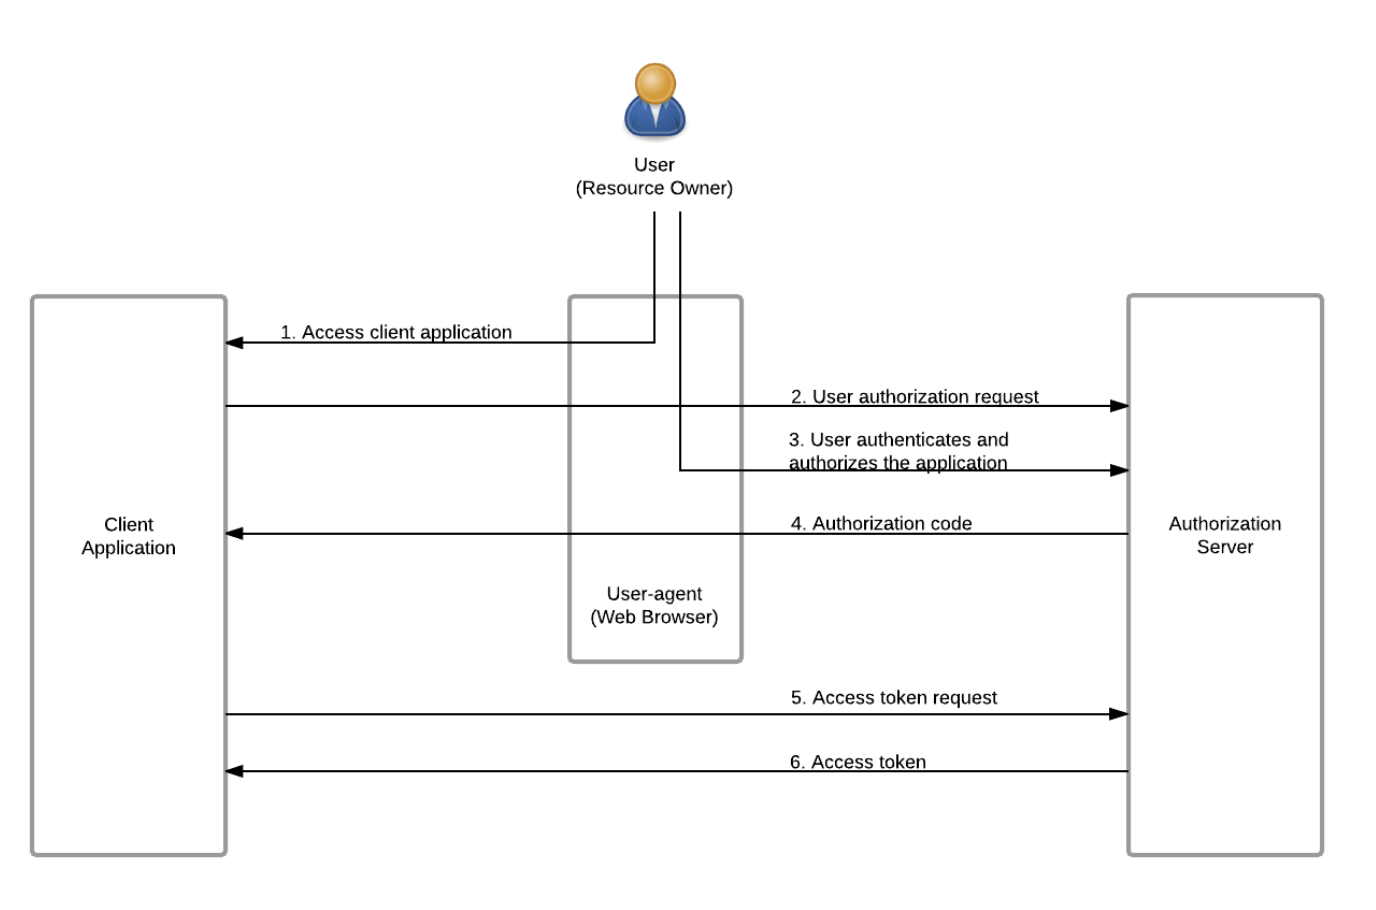
The tokens returned by the IDP to ShinyProxy are the following:
ID Token: A short-lived token containing user information (claims or attributes), formatted as a JSON Web Token (JWT) and not refreshable.
Access Token: A short-lived token used to authorize user access to ShinyProxy, which can be refreshed using the refresh token.
Refresh Token: Allows refreshing the access token, ensuring continuous user access.
ShinyProxy continuously refreshes the access token to maintain user authorization. To configure ShinyProxy with Amazon Cognito, the following parameters are required:
Auth Endpoint URL: The URL where OIDC initiates the authentication flows. ShinyProxy redirects unauthenticated users to this URL.
Token Endpoint URL: The URL where tokens are retrieved or exchanged during the authentication process.
JSON Web Key Set (JWKS) URL: The URL where the IDP’s public certificates are found, used during the authentication process.
Client ID: A unique ID generated by the provider for our application, visible in the URL during authentication.
Client Secret: A secret generated by the provider for our application, which should be kept secure.
This CloudFormation template sets up the following resources:
code) and scopes (openid, email). The client has token validity periods specified and supports secure interactions with ShinyProxy via callback and logout URLs.admin_users within the User Pool, intended for administrative users.AWSTemplateFormatVersion: '2010-09-09'
Description: CloudFormation template to create a Cognito User Pool, User Pool Client, and User Pool Domain.
Parameters:
Domain:
Type: String
Description: The domain name for the Cognito User Pool Domain
Resources:
UserPool:
Type: AWS::Cognito::UserPool
Properties:
UserPoolName: !Sub "${AWS::StackName}-user-pool"
AccountRecoverySetting:
RecoveryMechanisms:
- Name: verified_email
Priority: 1
AdminCreateUserConfig:
AllowAdminCreateUserOnly: True
DeletionProtection: INACTIVE
UserPoolAddOns:
AdvancedSecurityMode: ENFORCED
UsernameConfiguration:
CaseSensitive: False
AutoVerifiedAttributes:
- email
UserAttributeUpdateSettings:
AttributesRequireVerificationBeforeUpdate:
- email
Policies:
PasswordPolicy:
MinimumLength: 12
PasswordHistorySize: 3 # Number of previous passwords to restrict each user from reusing
RequireLowercase: true
RequireNumbers: true
RequireSymbols: true
RequireUppercase: true
TemporaryPasswordValidityDays: 3 # Number of days before an admin has to reset the temporary password
UserPoolClient:
Type: AWS::Cognito::UserPoolClient
Properties:
ClientName: !Sub "${AWS::StackName}-app-client"
AllowedOAuthFlows:
- code
AllowedOAuthFlowsUserPoolClient: true
AllowedOAuthScopes:
- openid
- email
IdTokenValidity: 1 # 1 hour
AccessTokenValidity: 1 # 1 hour
RefreshTokenValidity: 24 # 24 hours
TokenValidityUnits:
IdToken: hours
AccessToken: hours
RefreshToken: hours
CallbackURLs:
- !Sub "https://${Domain}.com/login/oauth2/code/shinyproxy"
LogoutURLs:
- !Sub "https://${Domain}.com" # Ensure the logout URL is the same as the one in the ShinyProxy configuration
ExplicitAuthFlows:
- ALLOW_USER_SRP_AUTH
- ALLOW_REFRESH_TOKEN_AUTH
GenerateSecret: true
UserPoolId: !Ref UserPool
UserPoolDomain:
Type: AWS::Cognito::UserPoolDomain
Properties:
Domain: !Ref Domain
UserPoolId: !Ref UserPool
AdminUsersGroup:
Type: AWS::Cognito::UserPoolGroup
Properties:
GroupName: admin_users
UserPoolId: !Ref UserPool
Description: Administrator users for the application
Precedence: 1
Outputs:
AuthUrl:
Description: Authorization URL for Cognito
Value: !Sub "https://${Domain}.auth.${AWS::Region}.amazoncognito.com/oauth2/authorize"
TokenUrl:
Description: Token URL for Cognito
Value: !Sub "https://${Domain}.auth.${AWS::Region}.amazoncognito.com/oauth2/token"
JwksUrl:
Description: JWKS URL for Cognito
Value: !Sub "https://cognito-idp.${AWS::Region}.amazonaws.com/${UserPool}/.well-known/jwks.json"
LogoutUrl:
Description: Logout URL for Cognito
Value: !Sub "https://${Domain}.auth.${AWS::Region}.amazoncognito.com/logout?client_id=${UserPoolClient}&logout_uri=https://${Domain}.com"
ClientId:
Description: Client ID for Cognito User Pool Client
Value: !Ref UserPoolClientFor detailed information on the parameters and resources, refer to the CloudFormation documentation on Amazon Cognito. The CloudFormation stack outputs include the formatted parameters, excluding the client secret, necessary for configuring ShinyProxy.
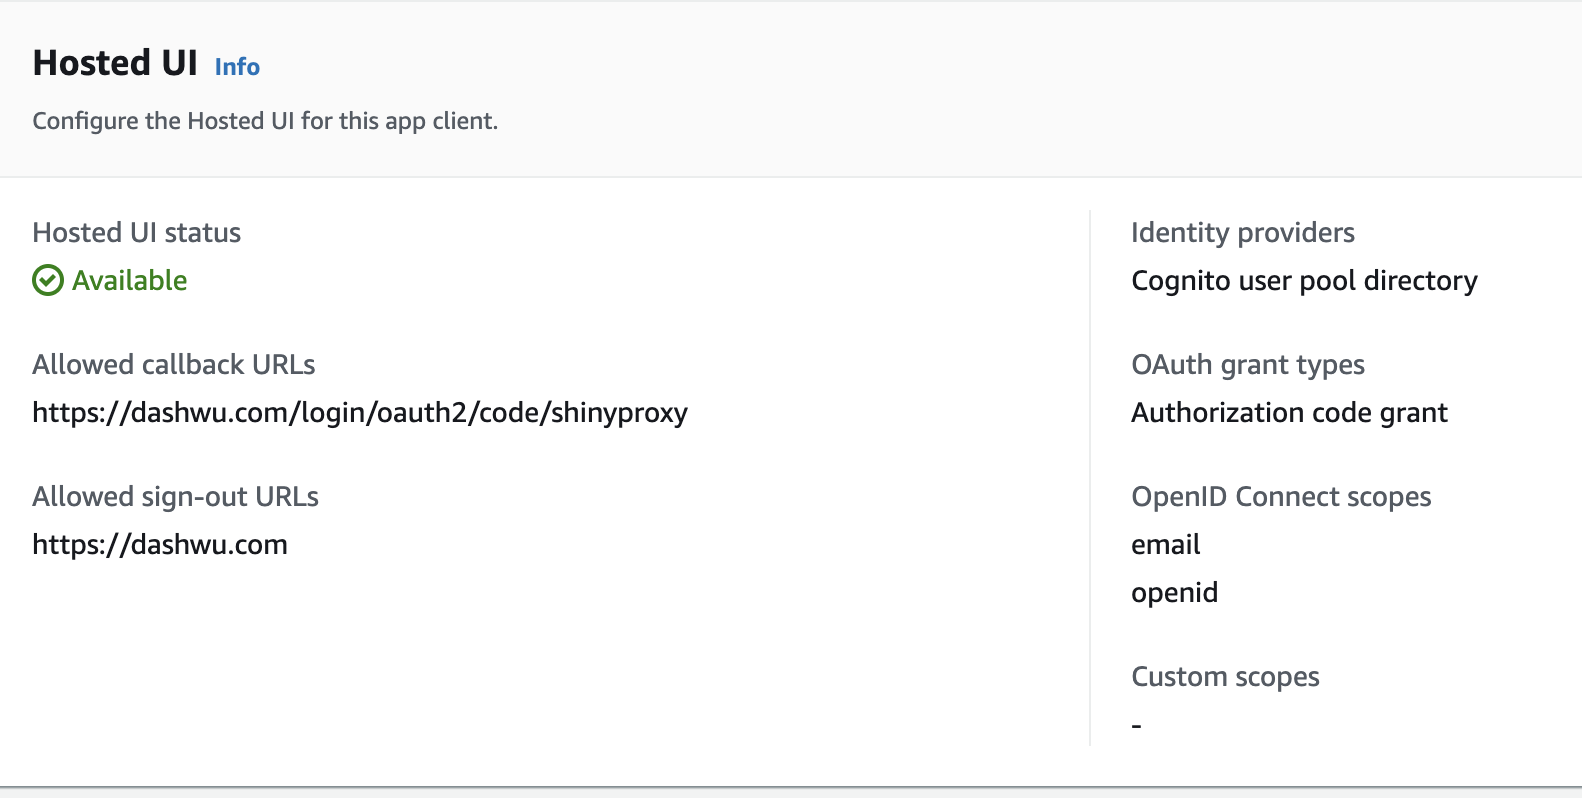
In the Cognito console, navigate to User pools -> App integration -> App client list -> Hosted UI. Choose Cognito user pool as the identity provider, then save the changes. This will enable the hosted UI for the user pool.
Stop the ShinyProxy service:
# Ubuntu
$ sudo service shinyproxy stop
# Amazon Linux 2023
$ sudo systemctl stop shinyproxy
Update the ShinyProxy configuration file with the OIDC parameters:
proxy:
  title: ShinyProxy
  landing-page: /
  bind-address: 127.0.0.1
  heartbeat-rate: 10000
  heartbeat-timeout: 60000
  port: 8080
  container-log-path: /var/log/shinyproxy # Path for container logs
  docker:
    port-range-start: 20000

  authentication: openid
  openid:
    roles-claim: cognito:groups
    auth-url: https://{COGNITO-DOMAIN}.auth.{AWS-REGION}.amazoncognito.com/oauth2/authorize
    token-url: https://{COGNITO-DOMAIN}.auth.{AWS-REGION}.amazoncognito.com/oauth2/token
    jwks-url: https://cognito-idp.{AWS-REGION}.amazonaws.com/{USER-POOL-ID}/.well-known/jwks.json
    logout-url: https://{COGNITO-DOMAIN}.auth.{AWS-REGION}.amazoncognito.com/logout?client_id={CLIENT-ID}&logout_uri={LOGOUT-URI}
    client-id: {CLIENT-ID}
    client-secret: ${CLIENT_SECRET} # Use an environment variable for the client secret

  specs:
    - id: shiny-app
      display-name: Ridge & Lasso App
      description: Demonstrates regularization effects on linear models
      container-image: {AWS-ACCOUNT-ID}.dkr.ecr.{AWS-REGION}.amazonaws.com/{ECR-REPO}:{IMAGE-TAG}
      access-groups: [admin_users, shiny_users] # Access restricted to admin and shiny_users groups
    - id: dash-app
      display-name: Sentiment Analysis App
      description: Analyzes text sentiment
      port: 8050
      container-image: {AWS-ACCOUNT-ID}.dkr.ecr.{AWS-REGION}.amazonaws.com/{ECR-REPO}:{IMAGE-TAG}
      target-path: "#{proxy.getRuntimeValue('SHINYPROXY_PUBLIC_PATH')}"
      access-groups: [admin_users, dash_users] # Access restricted to admin and dash_users groups

server:
  forward-headers-strategy: native
  secure-cookies: true

logging:
  file:
    name: shinyproxy.log
Similar to the simple authentication set up, the roles-claim parameter specifies the claim in the ID token that contains the user’s roles, determining access based on group membership.
Note: Ensure that the
LOGOUT-URImatches exactly between the Cognito console and the ShinyProxy configuration to avoid redirect mismatches. Use the well-formatted output parameters from the CloudFormation stack to prevent errors—even a trailing slash difference can cause issues.
{COGNITO-DOMAIN}: Cognito User Pool domain (e.g., ourdomain){AWS-REGION}: AWS region where the Cognito User Pool is located (e.g., us-east-1){USER-POOL-ID}: ID of the Cognito User Pool{LOGOUT-URI}: URI to redirect users after logout (e.g., https://ourdomain.com){CLIENT-ID}: Client ID of the Cognito User Pool application client{AWS-ACCOUNT-ID}: AWS account ID{ECR-REPO}: Name of the ECR repository{IMAGE-TAG}: Tag of the Docker image stored in the ECR repository${CLIENT_SECRET}: The Client Secret, set as an environment variableCreate a .env file to store the client secret:
$ sudo nano /etc/shinyproxy/.envCLIENT_SECRET=...Ensure the .env file is secure and not accessible to unauthorized users. Next, open the ShinyProxy service file:
# For both Ubuntu and Amazon Linux 2023
$ sudo nano /etc/systemd/system/shinyproxy.service
Add the EnvironmentFile directive under the [Service] section to point to the .env file:
[Unit]
Description=ShinyProxy
...

[Service]
EnvironmentFile=/etc/shinyproxy/.env
...
Reload the systemd daemon:
# For both Ubuntu and Amazon Linux 2023
$ sudo systemctl daemon-reload
Restart ShinyProxy:
# Ubuntu
$ sudo service shinyproxy start
# Amazon Linux 2023
$ sudo systemctl start shinyproxyFor group-based access control, create groups in the Cognito User Pool and assign users to these groups.

Test the authentication flow by accessing the ShinyProxy landing page. Users in the admin_users group should have access to both applications, while those in the dash_users and shiny_users groups should only have access to the Dash and Shiny applications, respectively.
With this setup, users can authenticate via Amazon Cognito and access the applications based on their group membership.
To further enhance the authentication experience and improve user communication, consider integrating Amazon SES. This service enables customized email notifications, such as password resets and account verification emails, thereby improving the overall user experience.
With these configurations, ShinyProxy is now well integrated with Amazon Cognito as the identity provider, offering secure, group-based access to the applications hosted on the EC2 instance.
The scripts, templates, and configuration files are all available in the following GitHub repository: shinyproxy-aws-deploy.